Back to main Corvair page
1966 Corvair Monza modifications
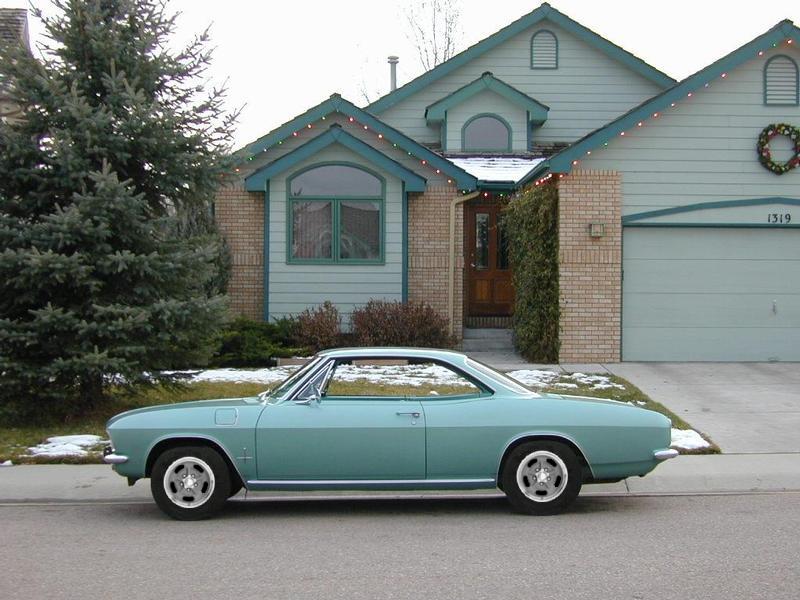
Olds 442 Super Stock III (SSIII) 15x7 wheels & H4 E-code headlamps
|
Wheels, Tires and Lights |
|
|
|
|
|
|
|
|
|
|
|
|
|
|
|
|
|
|
|
|
|
|
|
|
|
|
|
|
|
|
|
|
|
|
|
|
|
|
|
|
|
|
|


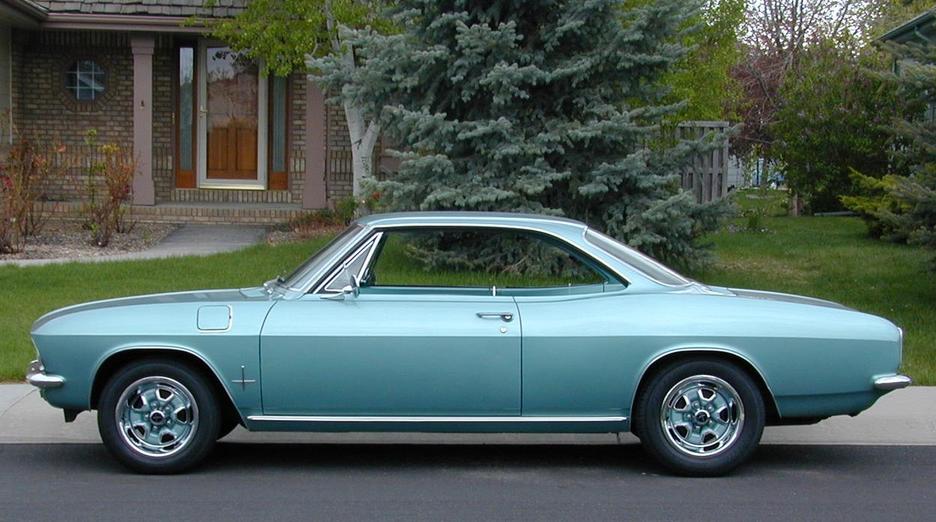


I wanted to get some 15-inch wheels so I could mount better tires. I agonized over wheel choices seemingly for ages... I found a picture of a late model Corvair with Oldsmobile 442 Super Stock wheels that looked really great.
Researching SS wheels at Oldsmobility, I found that I like the 1968 to 1974 Super Stock II/III wheels the best. For 1975, they changed the wheel's design in a way that I don't like at all. The simplicity of the original SS II/III style was lost. All the new Super Stock III wheels that are available from places like Wheel Vintiques are of the 1975+ pattern.
The other "problem" with the pre-1975 wheels is they are virtually all 14-inch. In 1969, the Hurst Olds 442 came with special 15-inch SS II wheels with dark gray centers and chromed rims. Those would have been ideal, but they are virtually impossible to find. A restored set of 4 of those recently sold on eBay for $2000! So strike that idea.
In the meantime, I came across the American Racing Salt Flat wheels. I even modified a picture of my car to see what it might look like with those wheels on it. Those wheels are a lot lighter (11 lbs each vs 27.5 lbs) than the Olds wheels and can be custom built with something not too far away from the correct backspacing (4-1/4" on 15x7" wheels). Unfortunately, the centerbore of the wheels was something like 3-1/8" instead of 2-7/8".
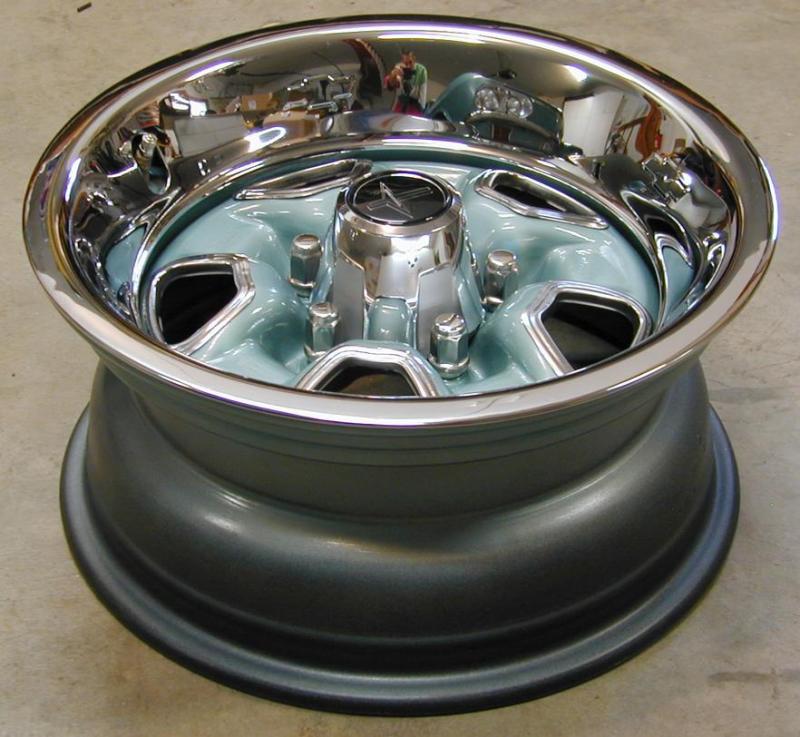
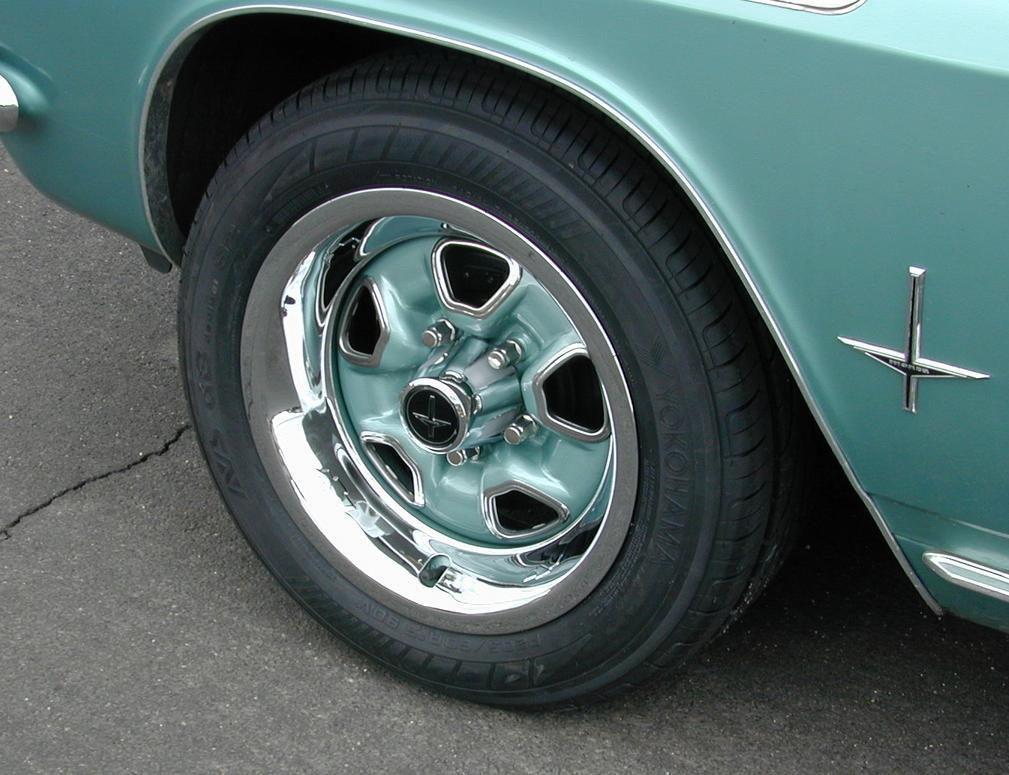
Then I found that in 1974, Oldsmobile had a 15-inch super Stock wheel made in the old pattern - for just one year. I managed to locate a set of those. They had a couple peeling coats of white paint on them, but came with center caps (2 sets, actually), trim rings and all the bezel trims. None of the center caps were very good, and 2 of the trim rings had curb rash on them. I bought a handful more center caps on eBay for nominal cost, but hardly any of them were any good, either.
You can get all the OEM trim parts for these wheels, but they're very expensive. One trim ring is about $90! Center caps are not much cheaper. I found some highly polished GM licensed stainless steel trim rings for 15x7 inch wheels for $60 for the set on eBay. It was going to cost about $75 each to have the center caps re-chromed, so I ended up getting new ones.
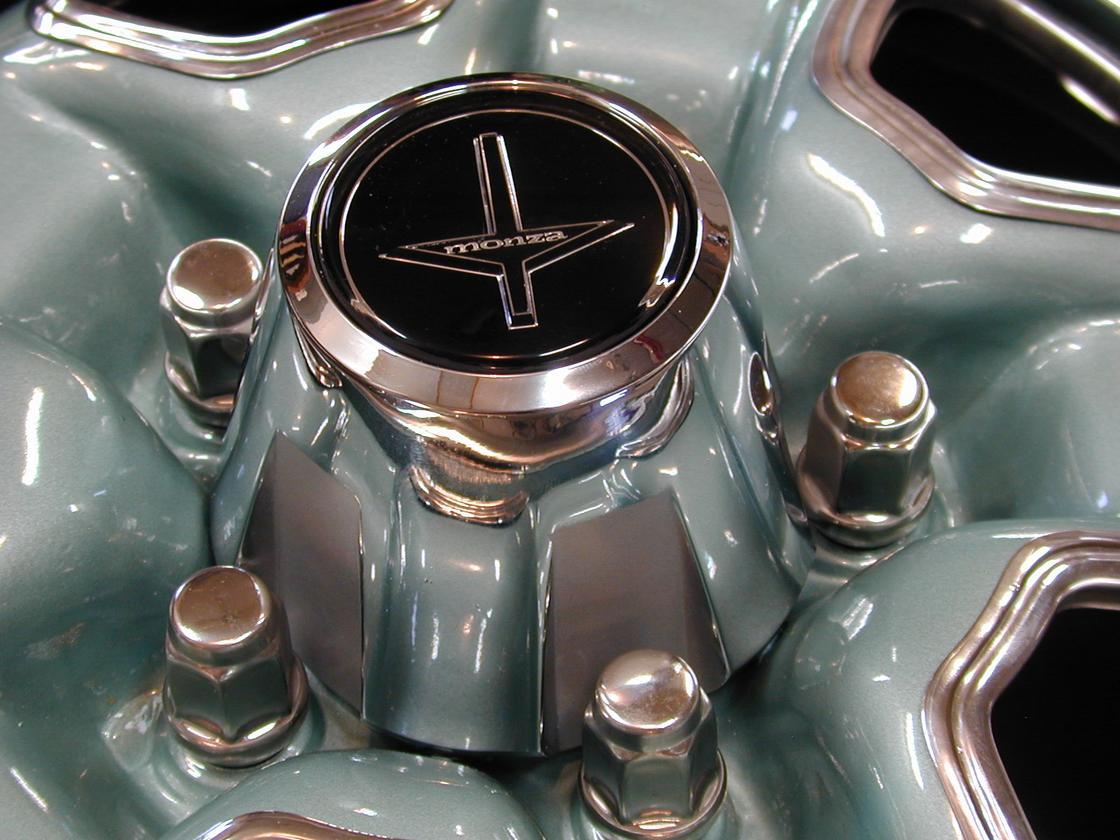
Having grown up in an "Oldsmobile household," I have a great fondness for Oldsmobile products. Still, I didn't want Olds Rocket centercap logos on my Corvair wheels. The horn button emblem on my car seemed to be about the right size for this application, so I got a couple ratty ones to experiment with (again on eBay - hmm... seems to be a trend here ;-). Grinding them down to a smaller diameter and beveling the edges on the disc sander made them fit perfectly in the center cap recess. Clark's Corvair Parts has new reproduction horn buttons, so I bought 4 to use on these wheels. I think they turned out very well.
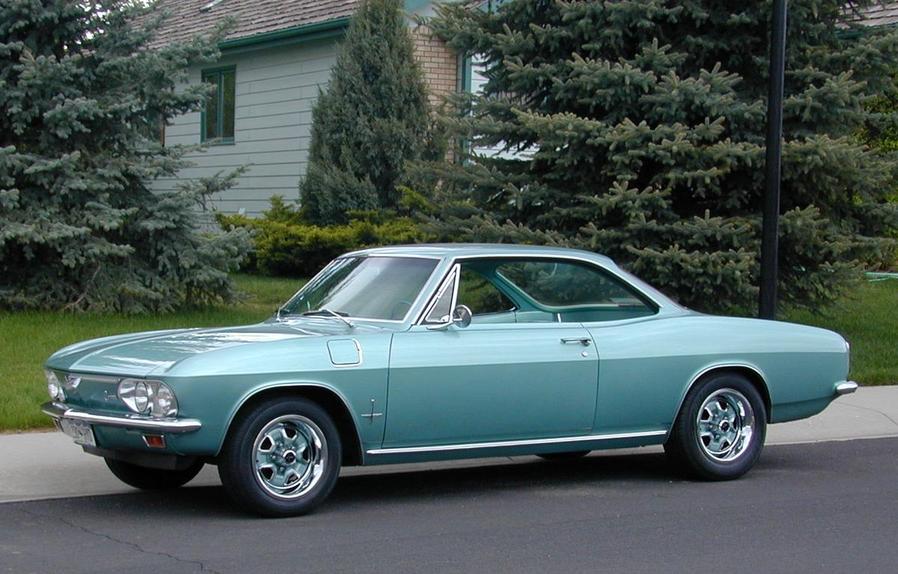
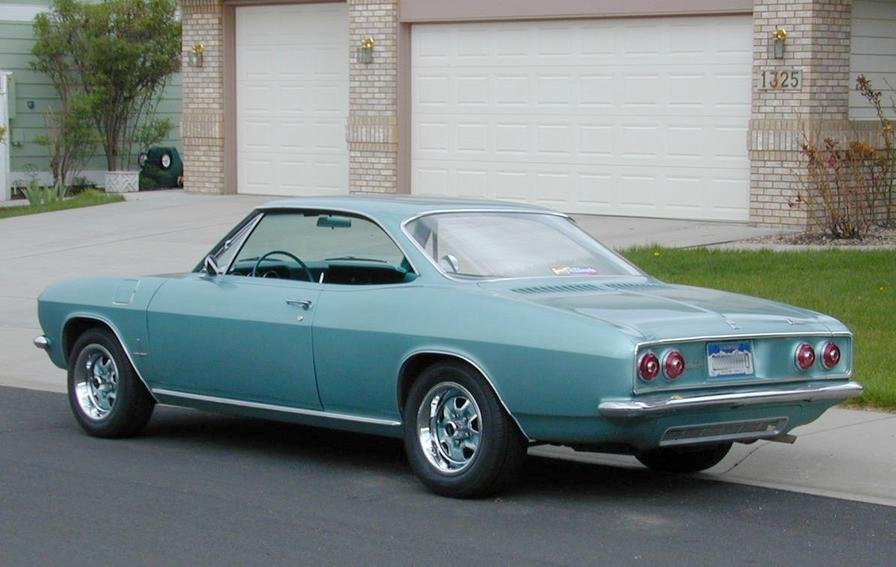
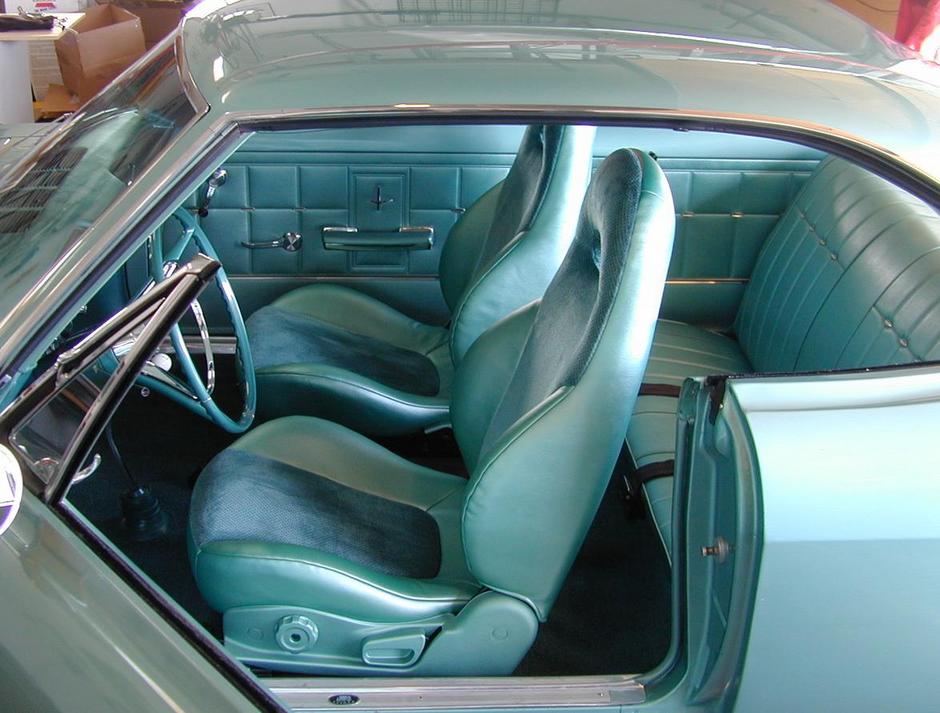
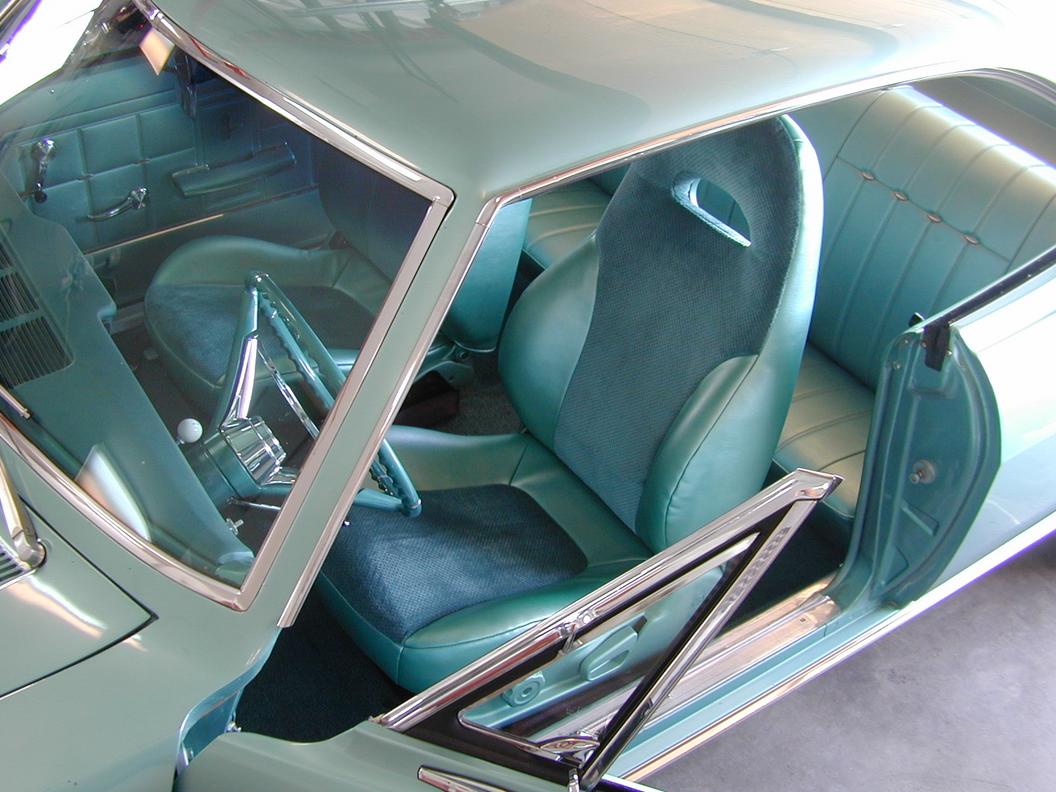
I stripped/blasted at least 4 layers of paint off the wheels to bare metal. George Leyner at Colorado Corvairs & Classics did a great job painting them to match the original Artesian Turquoise of the car. I polished all the OEM stainless steel bezel trims on a cloth wheel with rouge to an acceptable glow.
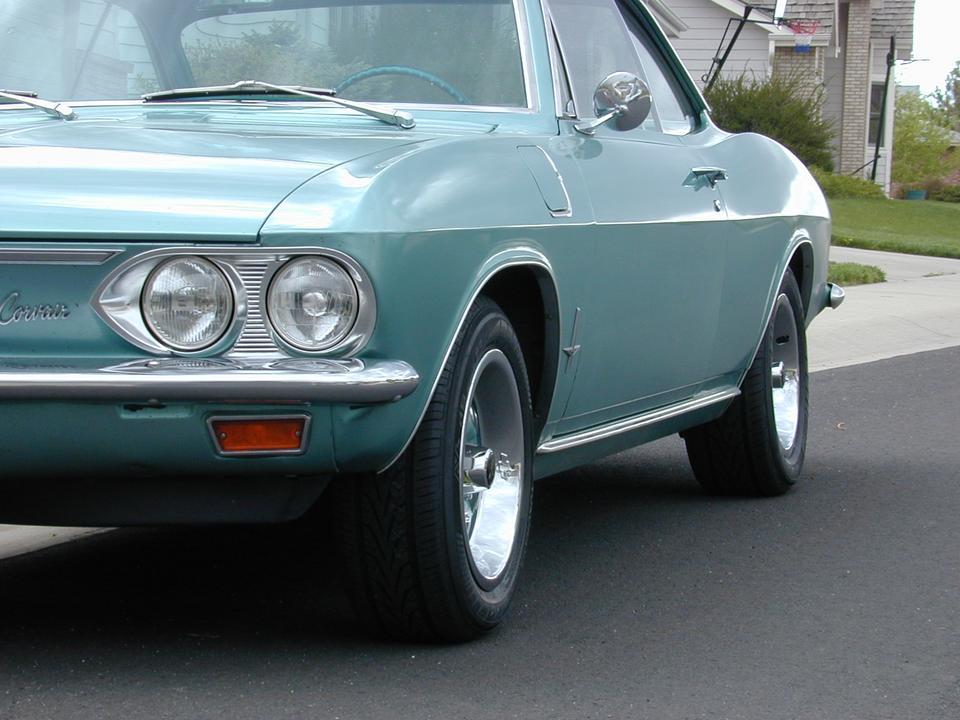
Of course, then I had to agonize about tire sizes... ;-) I like the big-little look of taller and/or wider tires on the back, but I've never had a car that I couldn't rotate the tires to even the wear. I finally decided not to be concerned about that. It's not like I drive this car 20,000+ miles a year... There is a fair amount of information and discussion on the Web about what size(s) tires will fit on various Corvair models. I wanted fairly tall-section tires so as not to make the ride too harsh. I finally settled on 205/60-15 front and 225/60-15 rear.
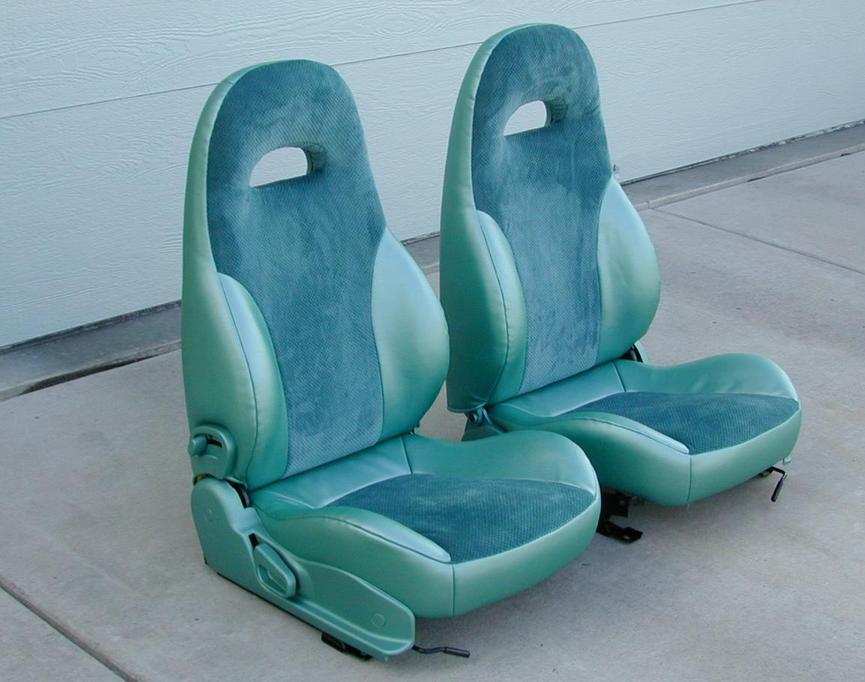
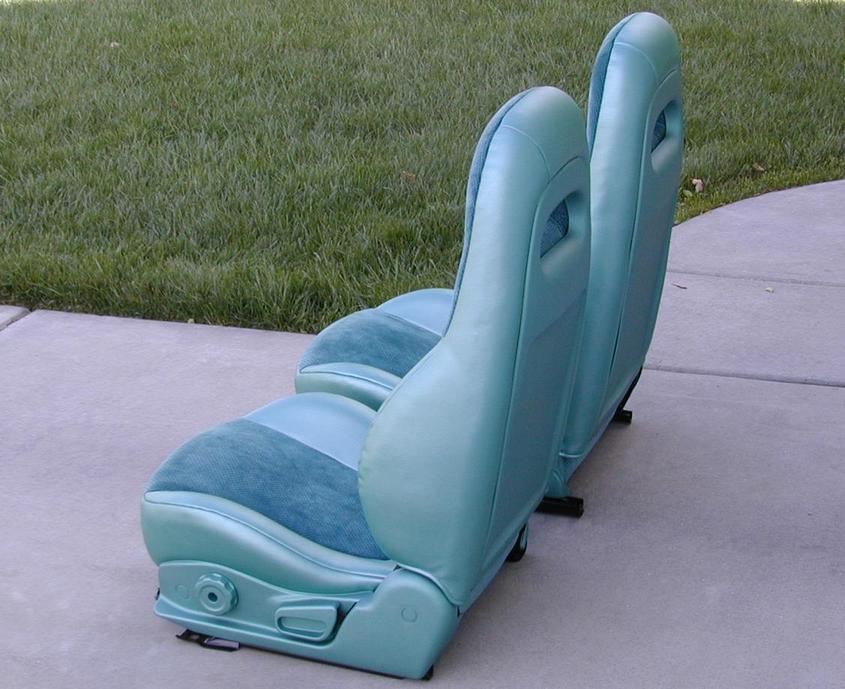
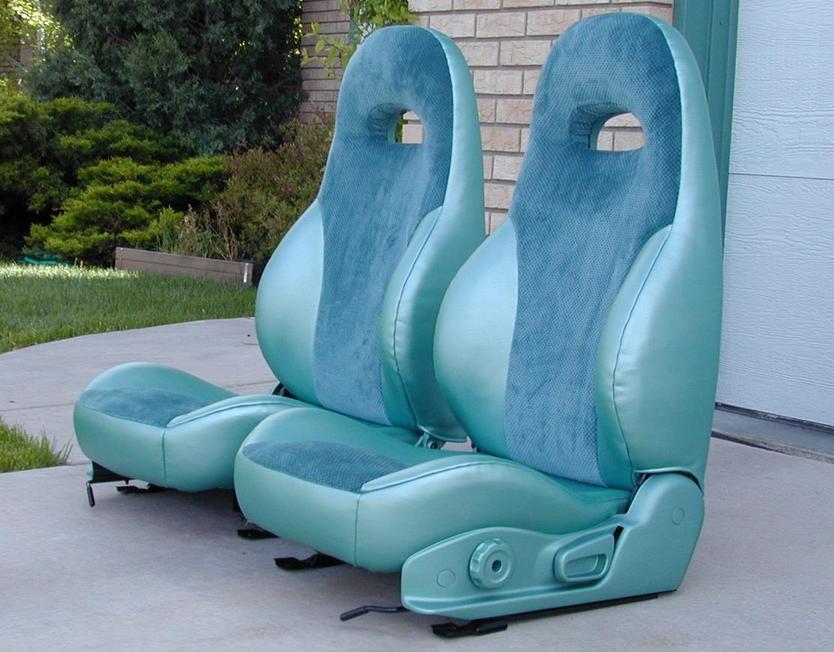
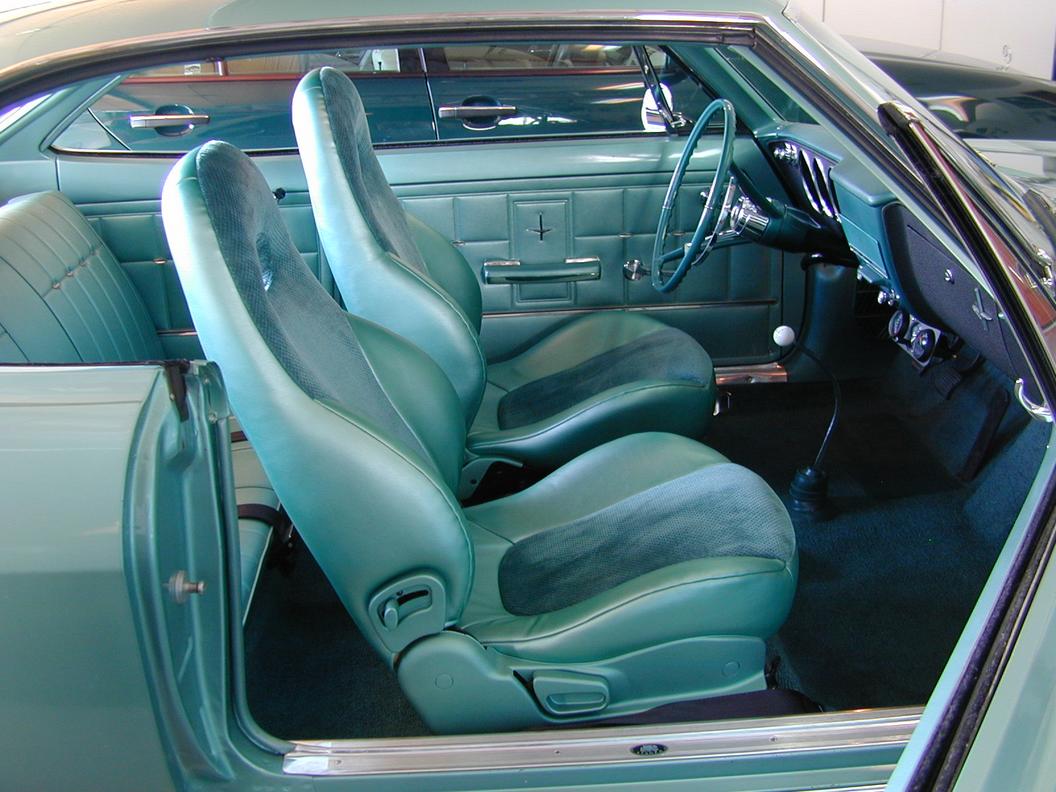
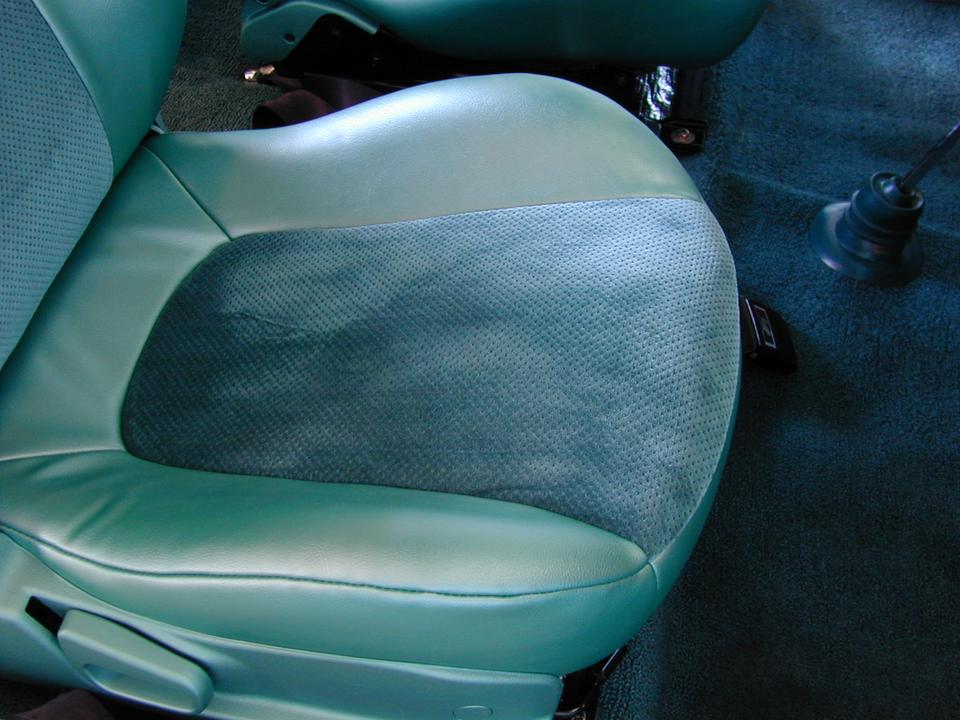
A Corvair owner I've corresponded with has Yokohama AVS dB tires on his car (with reproduction Super Stock I wheels from Wheel Vintiques). He enthusiastically endorsed them as quiet, comfortable and sticky. Yokohama now makes the AVS dB S2, which is what I have on my wheels. I haven't yet had a chance to drive the car with these wheels and tires, though (the seats are out for reupholstering).
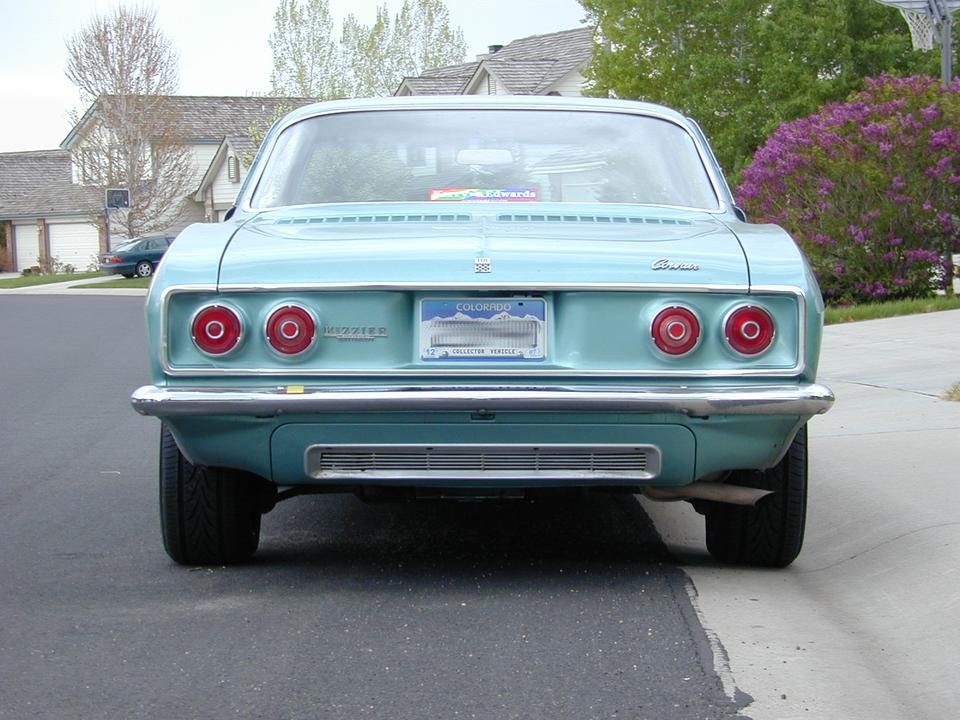
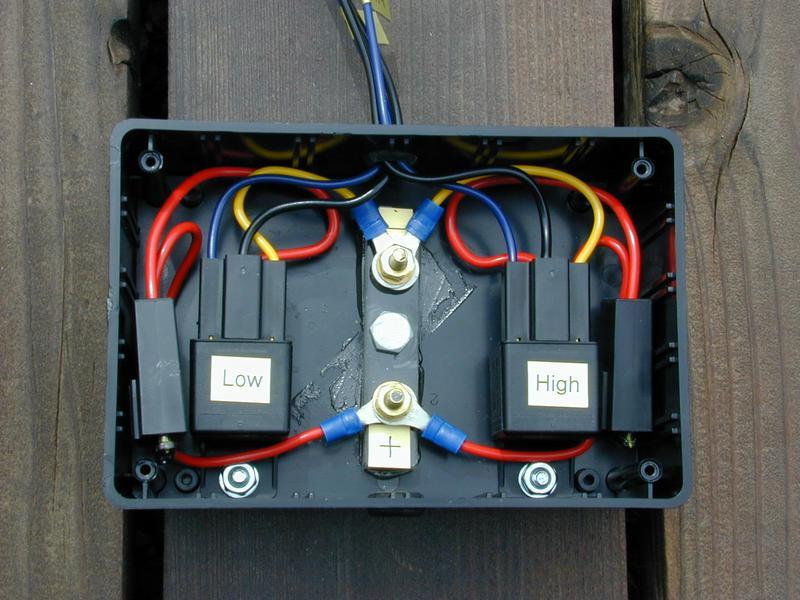
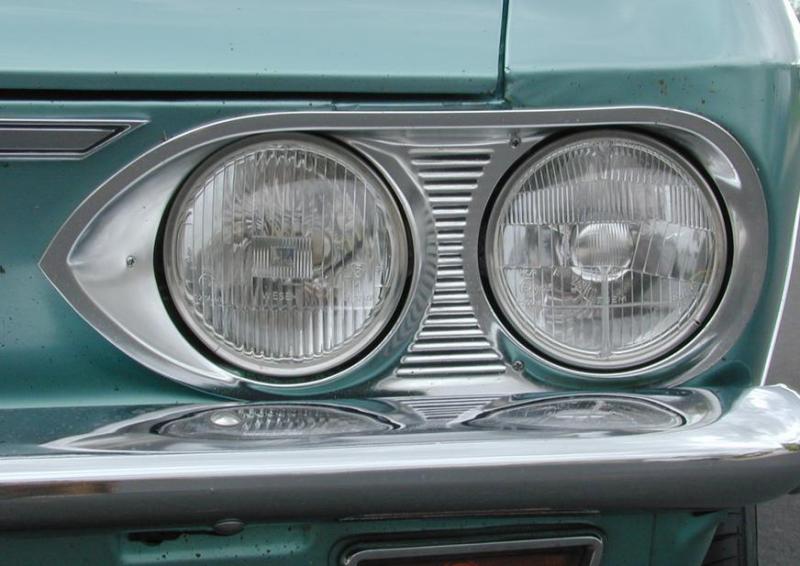
I also wanted to improve the headlights, so I got a set of Delta Tech H4 E-code headlamps from Clark's. Since these are 60 watts instead of 35 watts, I ran a pair of fused 10-gauge wires up from the battery to a relay box in the trunk, where I tapped into the headlight wiring harness. That limits the voltage drop at the headlights to 0.5V. I aimed the headlights and went out to test them. The comparison between the H4 lamps and the original T3 lamps is astonishing!
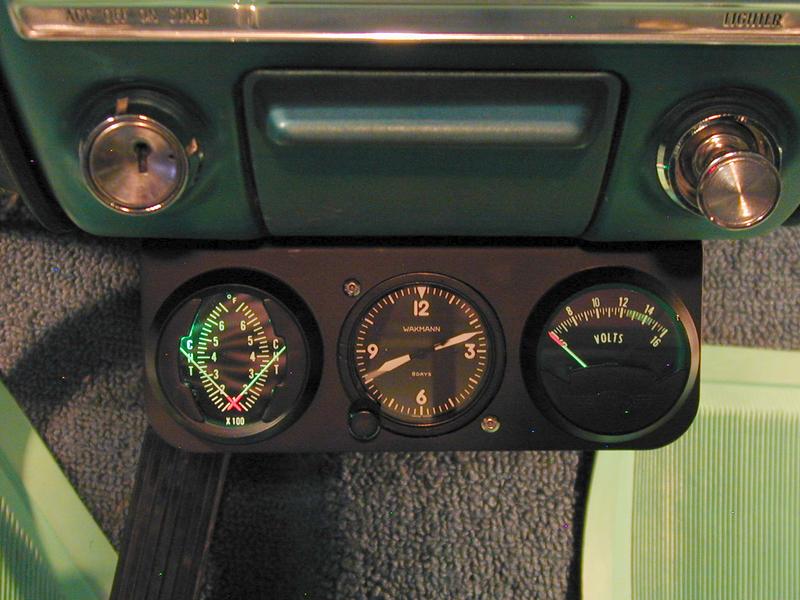
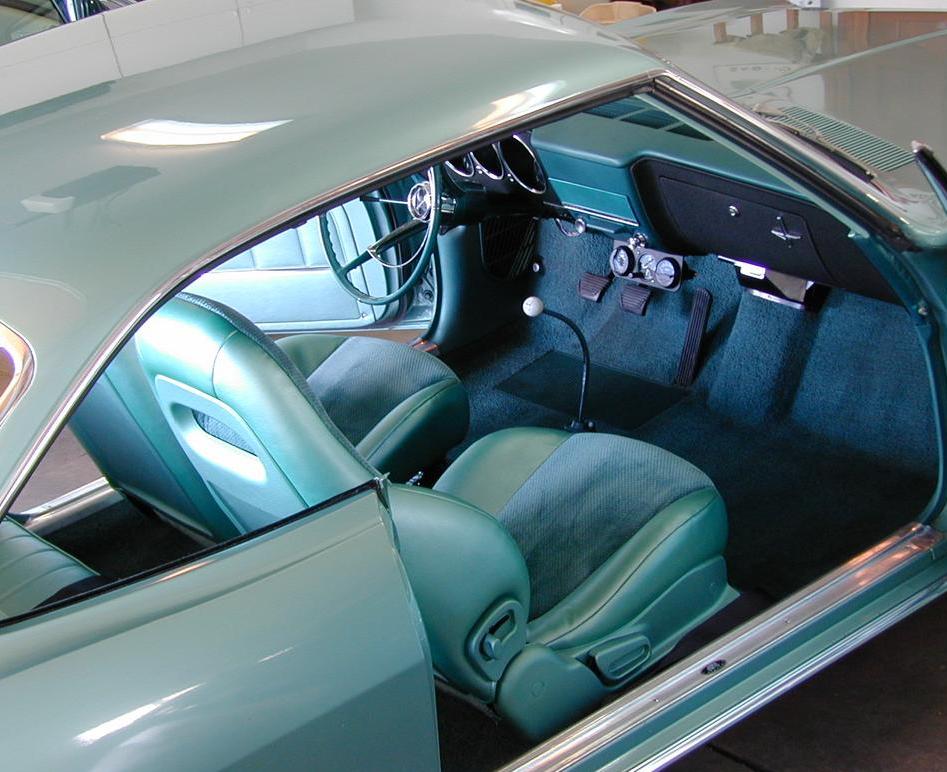
Just under the ashtray, I installed a 3-gauge panel containing a Westach dual cylinder head temperature gauge, a Westach voltmeter and an ex-USN Wakmann type A-11 8-day (wind-up) aircraft clock. The cylinder head temperature thermocouples are ring terminals that go under the rear spark plug on each side of the engine. It will be interesting to see what the running temperature turns out to be. Of course, I don't really have any good guidelines as to what is an acceptable operating temperature range. Initial tests show the left side reads 25 deg F lower than the right.
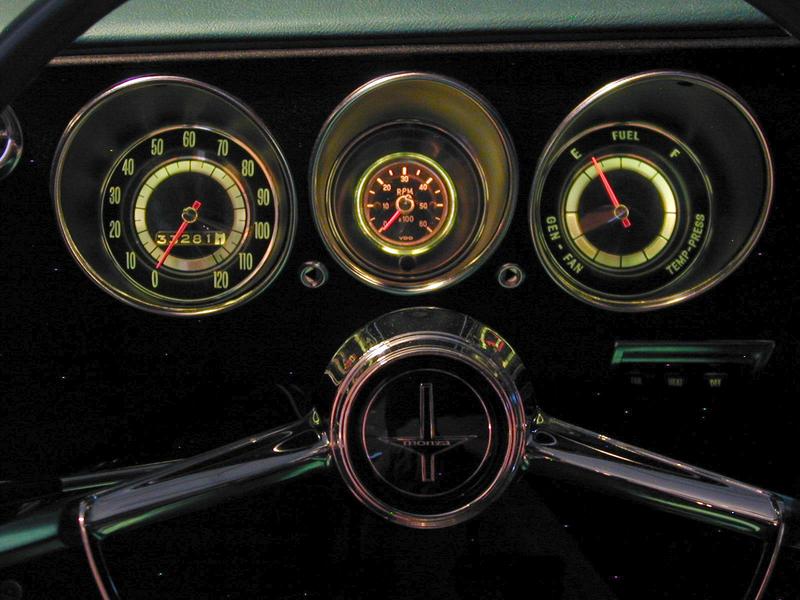
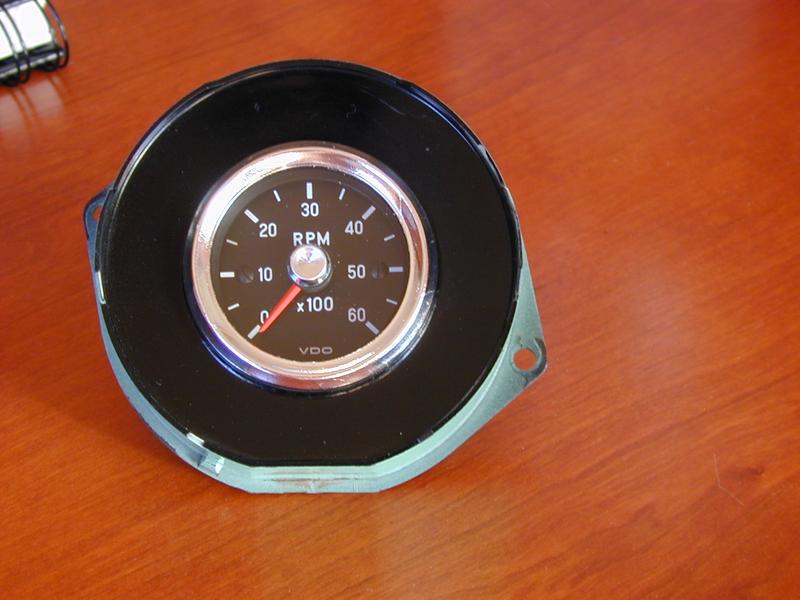
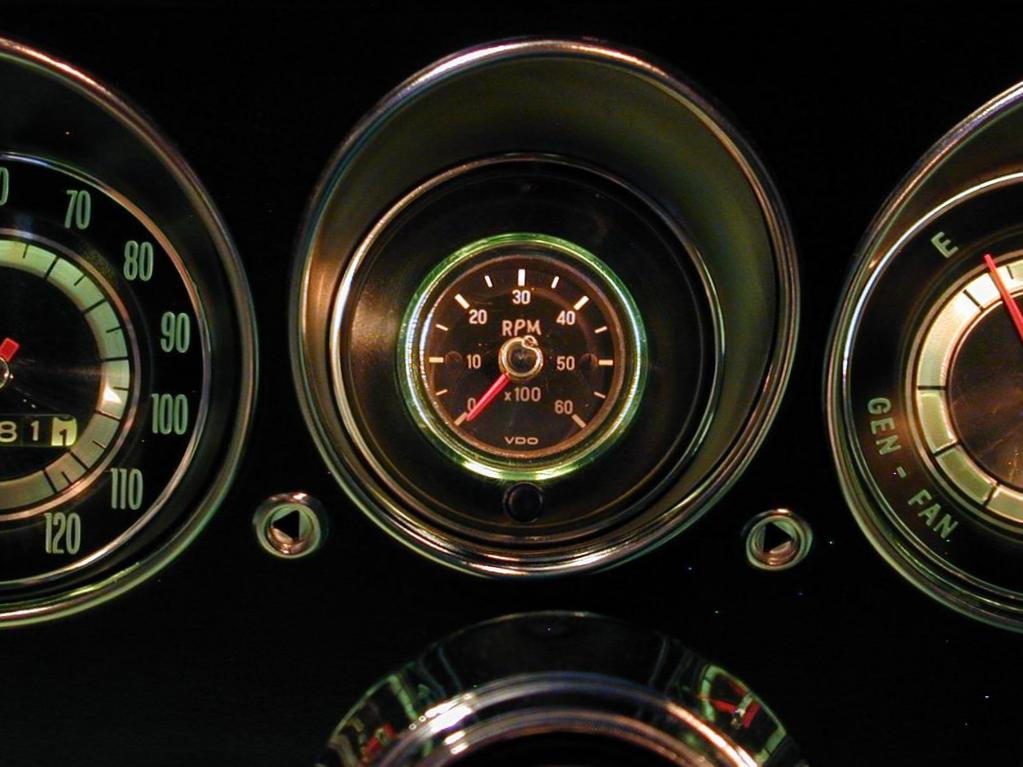
My tachometer project is finally installed and operating! I bought a VDO #333-958 2-1/16" diameter tachometer to mount in the blank "plug" where the optional clock would mount. I glued the chrome plastic center decoration from the plug onto the tach glass and used Bare-Metal brand adhesive foil to create a shiny rim on the tach. It still took 5 wires to hook it up: +12V and ground for the gauge, +12V and ground for the light and a fifth wire for the tach signal for the coil. This last wire required a diode to interact nicely with the Pertronix Ignitor II points replacement system I'm running. My only reservation about this tach is it looks more like an oil pressure gauge than a tachometer ;-)
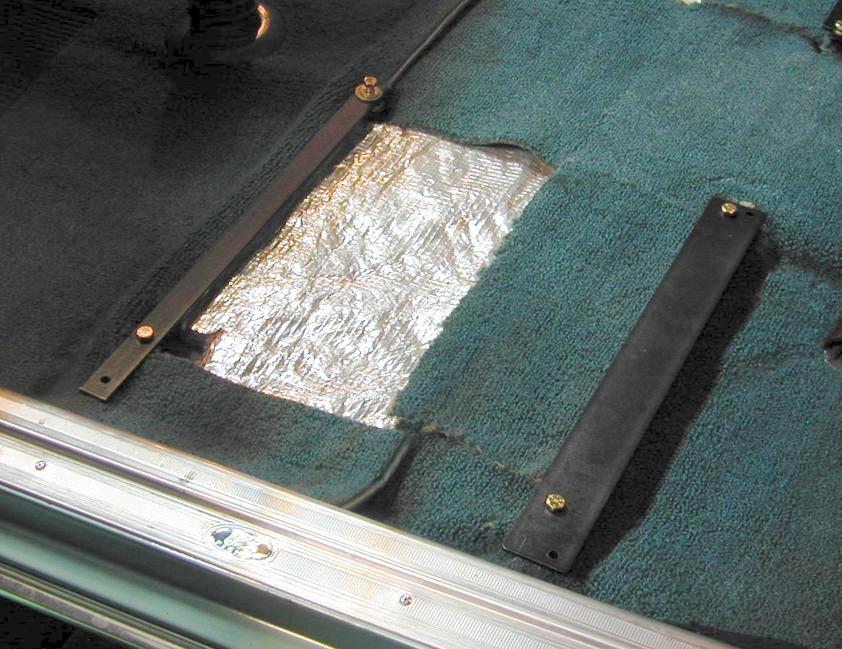
I ended up running quite a bundle of wires through the center tunnel under the car: